Sewer Connection Information Collection Mobile App User Manual
- SCIC
- Introduction
- Login
- Dashboard
- Collecting Sewer Information
- Uploading Sewer Information
- Miscellaneous (Permissions)
SCIC
|
Sewer Connection Information Collection Mobile App User Manual |
|
© 2022-2025 by ISPL & GWSC-AIT is licensed under CC BY-NC-SA 4.0 Version 1.0.0 |
Introduction
1.1 Purpose
The document's purpose is to guide municipal staff members on the functionalities of the Sewer Information Collection Mobile App of Base IMIS, allows the collection of the unique ID of both the building and the corresponding sewer network through a field survey. The collected building ID as well as sewer ID are maintained by the Sewer Connection Information Support System, and once approved it is reflected in the Building Information Management System, which updates the sanitation system and utility information of the building. It details the step-by-step procedure of all the functionalities within the app. The app is a mobile tool designed to help the Municipality digitize, maintain, and update the sewer database. The collected sewer data from this app undergoes a verification process through the Web application of Base IMIS. This process includes adding necessary attribute data to create and maintain a comprehensive dataset of sewers connected to buildings.
1.2 Targeted Audience
Targeted users of this manual are the Infrastructure Department of the Municipality. This manual guide to perform details related to the actual sewer connection network.
1.3 App Installation
An APK file will be made available in a common access location or shared via a link that can be downloaded and installed on your device.
1.4 Installation Procedure
· Download the APK file on your device and go to the ‘Downloads’ folder using the ‘File Manager’.
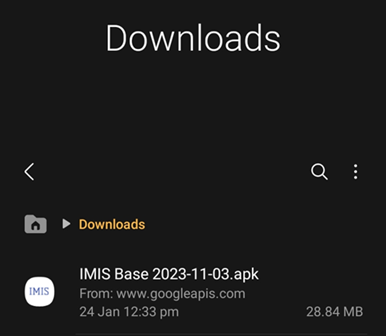
Figure 1-1 APK file
· Locate the corresponding .apk file and tap on it. The installation process will begin.
· Tap on ‘INSTALL’. An “Installing…” progress bar will be displayed.
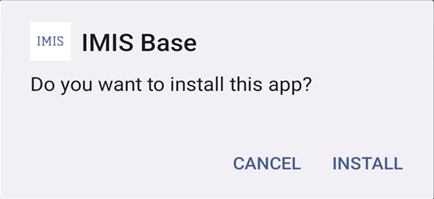
Figure 1-2 Installation process
· Tap on the ‘Open’ after the installation process is completed.
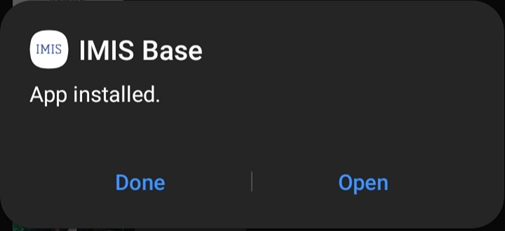
Figure 1-3
Overview:
· The installed app can also be accessed from the App drawer or Launcher.
Login
2.1 Opening the app
· On opening the app for the first time, the user is asked for their login credentials.
· Enter the email address and password provided in the textbox.
· Tap on ‘LOG IN’.
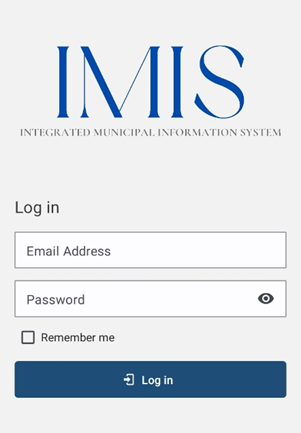
Figure 2-1 Login
Overview:
· This login credential is created and provided by the Municipality Admin to the Sanitation Department.
· The app retains the login information until the user's session becomes inactive or expires.
· It is to be noted that GPS needs to be turned on while using the mobile application. When the user is using the app for the first time, the user must allow location permission to the app
· Once successful login, the user is redirected to the Dashboard screen.
Dashboard
· After successful login, a dashboard page is displayed.
- To collect sewer connection information, a user should select the 'Sewer Map'.
- To review, and upload the collected sewer connection information the user should select 'Sewer Data'.
- Click on the three dots at the top right corner to log out.
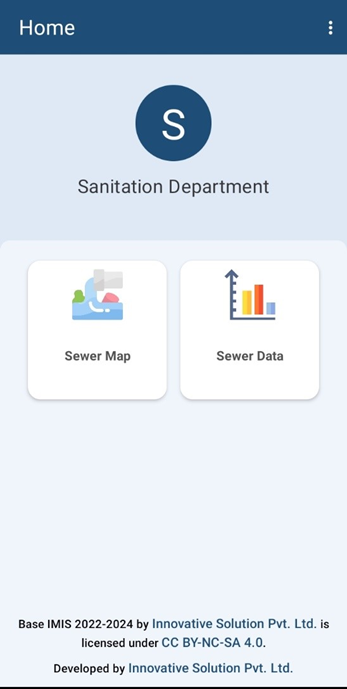
Figure 1-1 Dashboard.
Overview:
· The app provides offline data collection features, as well, where the collected data is stored locally on the user’s device which can be uploaded to the server once online. However, to load the map and other layer features, internet connection is required. Thus, it is recommended to pre-load all map features for the area if internet connection is not available in the field.
· Once the data is uploaded successfully, it won’t be visible on the user's device.
Collecting Sewer Information
4.1 Sewer Map
The map interface will be displayed once ‘Sewer Map’ is selected, where the user can collect sewer information.
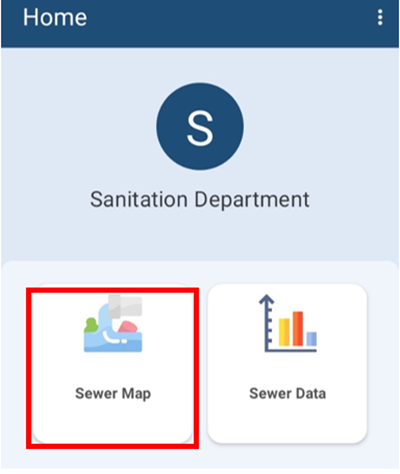
Figure 4-1 Dashboard (Sewer Map)
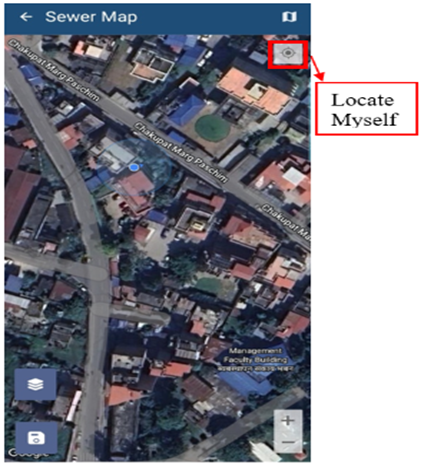
Figure 4-2 Map Interface
Tools:

Figure 4-3 Sewer Map
· Clear Map: Tap to remove the added marker.
· Switching Maps: Tap to toggle among various Google base maps e.g., Street and Satellite.
· Locate Myself: Tap to locate the current position of the user.
· Zoom In/Out: Tap to zoom in and out of the map.
· WMS Layers: Tap to get WMS Layers of the map. The WMS Layers is a dynamic tool that draws an overlay on the Map. It can display the different layers of data such as Building Data, Road Data, Ward data and Sewer Data. This functionality allows the user to view digitized data stored in the database. When the user taps on the ‘WMS Layers’, a pop-up appears prompting them to select the desired layers. Once selected, the corresponding data layers are highlighted on the map.
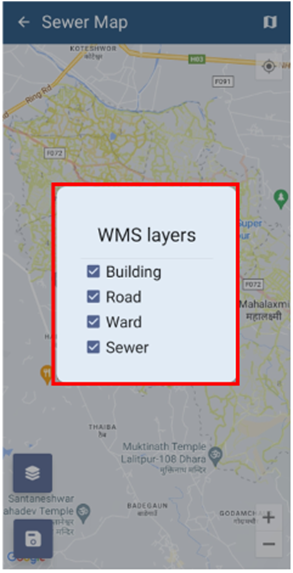
Figure 4-4 WMS Layer Toggle
Save: Tap the ‘save’ icon to store the added information.
4.2 Sewer Data Collection
Once the map is visible, click the "Locate Myself" button to find your exact location. If your location point (blue marker) is not accurate on the map, make sure it is correctly placed by referencing nearby roads and buildings displayed by Google Maps and the WMS layer. If your location is accurately displayed on the map, you can inspect the area around the building’s perimeter, follow the blue marker indicating your current location, look for any pipes or markers that indicate underground utilities, and enter the data of the building's sewer connection accordingly.
The user can also turn the WMS layer on to view the pre-existing buildings.
When the user taps the save icon, a dialogue box will appear, and the user will need to select the Building Identification Number (BIN) and Sewer Code of the building from the displayed dropdown options, and then tap 'Save'.
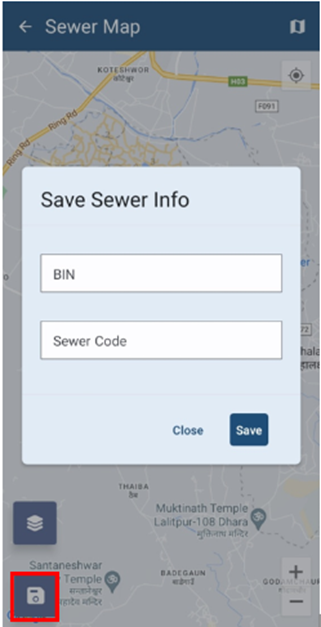
Figure 4-5 Save Button on Map
Uploading Sewer Information
- To view the list of Sewer Data collected, tap ‘Sewer Data’.
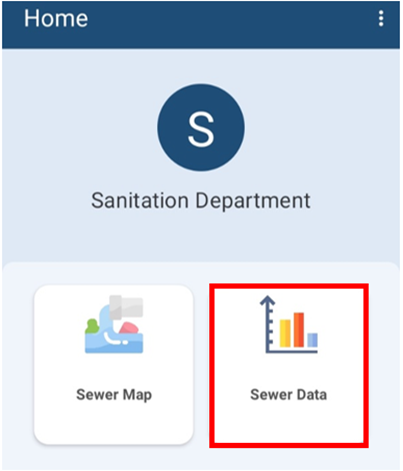
Figure 5-1 Sewer Data
Overview:
· Sewer data collected by the user are stored on the local device memory. Once the user has internet access, the user can transfer the data to IMIS
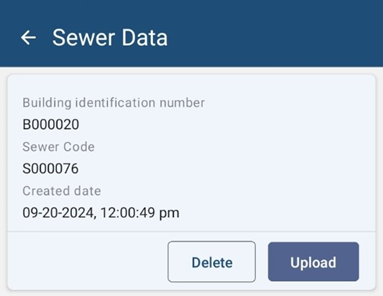
Figure 5-2 Sewer Data List
Tools:
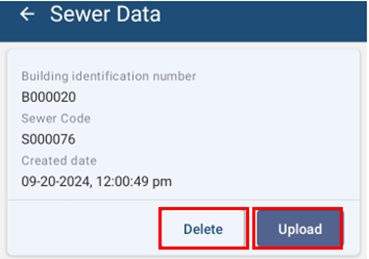
Figure 5-3 Sewer Data Tools
· Upload: The User can upload the sewer data by tapping on ‘Upload’. Once the data has been uploaded to IMIS, a message box will appear. Tap ‘OK’ to exit.
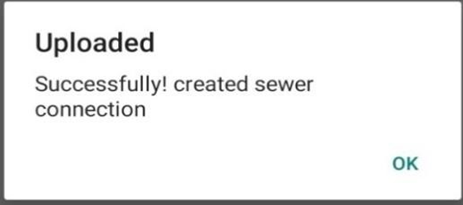
Figure 5-4 Upload confirmation box
· Delete: The user can delete the recorded data by tapping on ‘DELETE’. A message box will appear, to confirm the deletion.
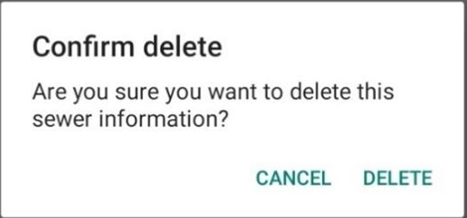
Figure 5-5 Delete confirmation box
Miscellaneous (Permissions)
· When the user is using the APP for the first time, the user must provide location permission to the app.
· Allow IMIS Base to access this device’s location requested by the App by clicking ‘While using the app’.
· Allow IMIS Bases to access photos and media on your device by tapping ‘ALLOW’ to grant access to the photos and media.
The user is also prompted to always turn on location services while using the mobile application.
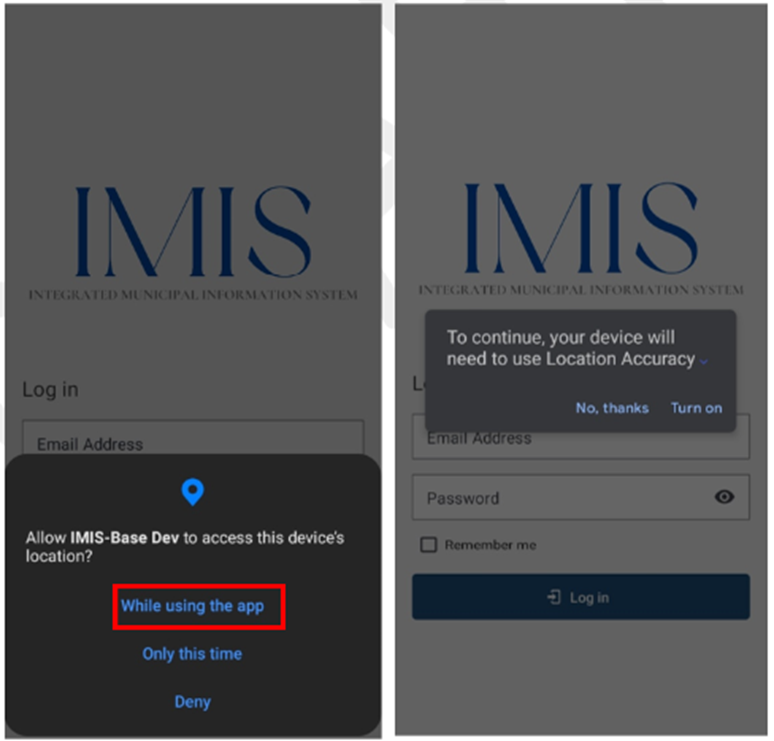
Figure 6-1 Location Permission