10.6 Emptying Service IMS
Emptying Service IMS includes the sub-modules which allows the management and monitoring of the sanitation value chain. This sub-module includes Applications, Emptying, Sludge Collection, Feedback, and Help Desk, which are the primary components of the sanitation value chain.
10.6.1 Application
The Application sub-module is responsible for managing information related to submitted Emptying Service Applications. It stores data of applications received through the help desk that require emptying, and applications that have already been serviced. The Applications page serves as a central hub for all service delivery processes, as it contains all components of the service delivery chain.
On the Applications page, user can access the status of an application through four different Stages: Application, Emptying Status, Sludge Collection Status and Feedback Status. By clicking on the corresponding button next to the check mark, user can view the emptying information or sludge collection or feedback related to a particular application. User can edit the emptying details, sludge collection details and feedback details at certain stages of the application process.
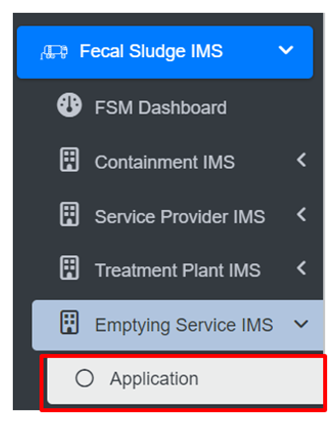
· Open the sidebar and click on Fecal Sludge IMS to expand.
· Now, click on the Emptying Service IMS and select Application.
• On the application page, the data such as Employee information, Desludging vehicle, and Emptying Service IMS are only visible according to the assignment of the service provider and its disposal place, where service provider1 can only view the details related to the service provider1. This page provides different Filter, Actions and Tools that can be used according to the requirements. For more details (refer to section 5 Filters, section 6 Actions , section 8 Tools and section 10.2.4 Emptying Service History).
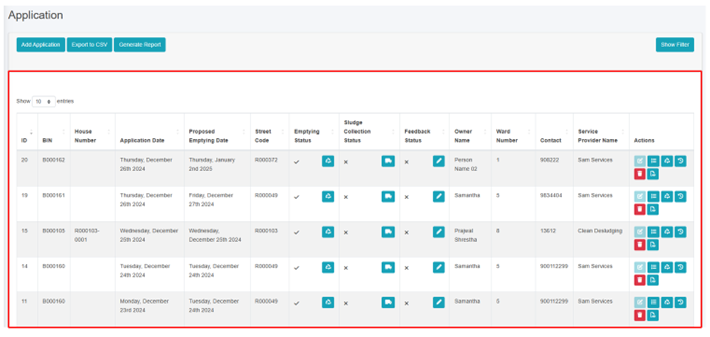
Figure 10- 19 List of Application
b) Generate Report
Generate Report tool produces the report in a PDF format monthly. Here the reports consist of different information such as: Operator name from where the containments are emptied, number of containments that is cleaned, total volume of sludge collected, number of applications who received the service and the total cost that is incurred during the sludge collection process. It also consists of ward wise cumulative data that of selected month displaying the ward no, containments emptied, application received, sludge collection and total cost.
· Click on ‘Generate Report’.
· Select the month and year field from dropdown.
· Click on ‘Export to PDF’ button to get the data based on the desired selections.

Figure 10- 20 Generate Report
Overview:
- User can download a report in PDF format, as shown below:
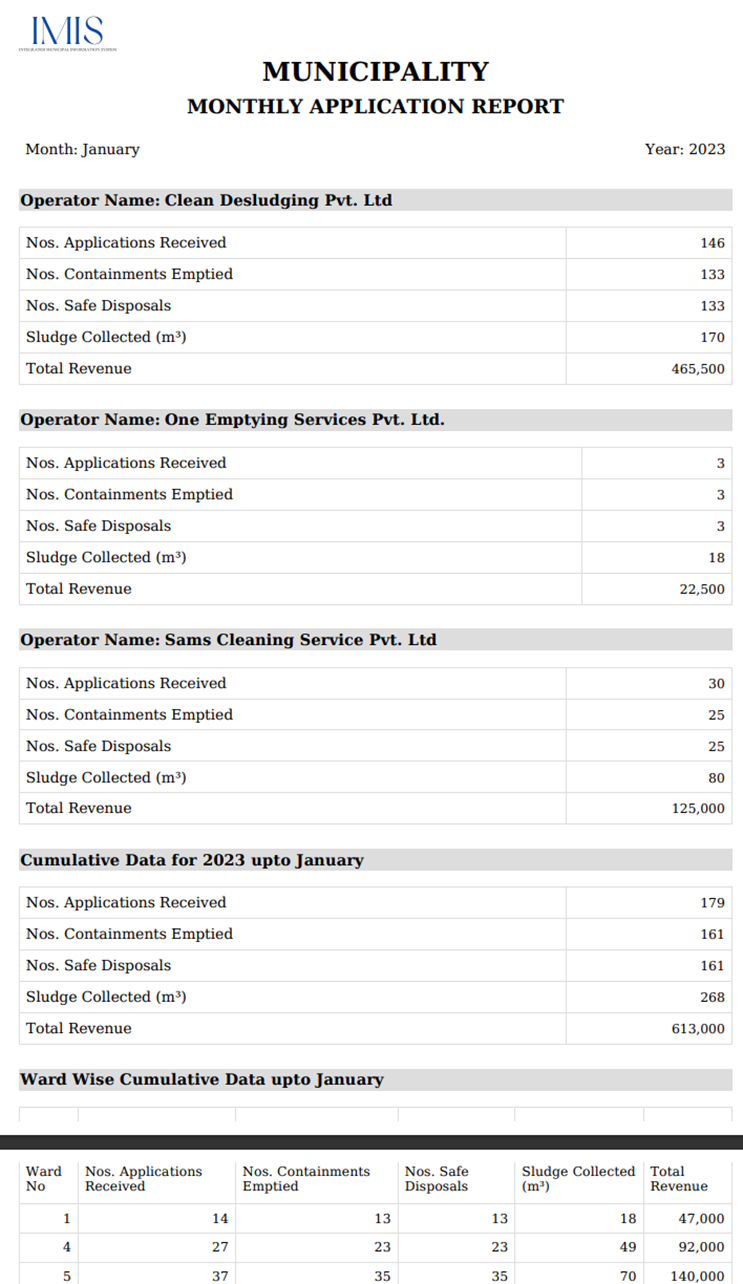
Figure 10- 21 Overview of Generated Report
c) Add Application
· Click on the ‘Add Application’ button.
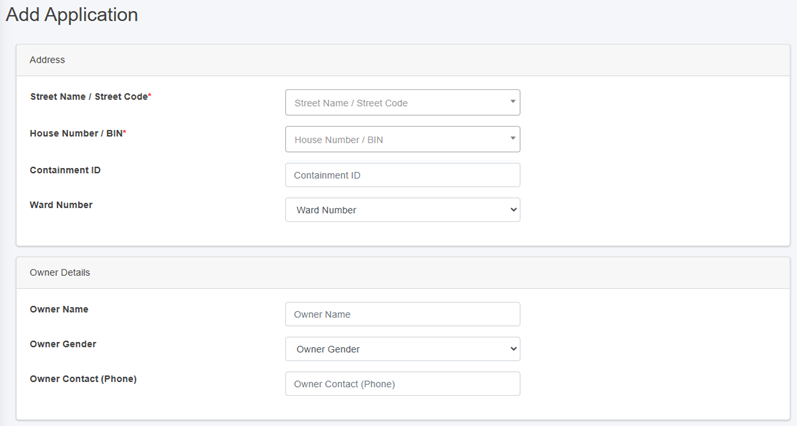
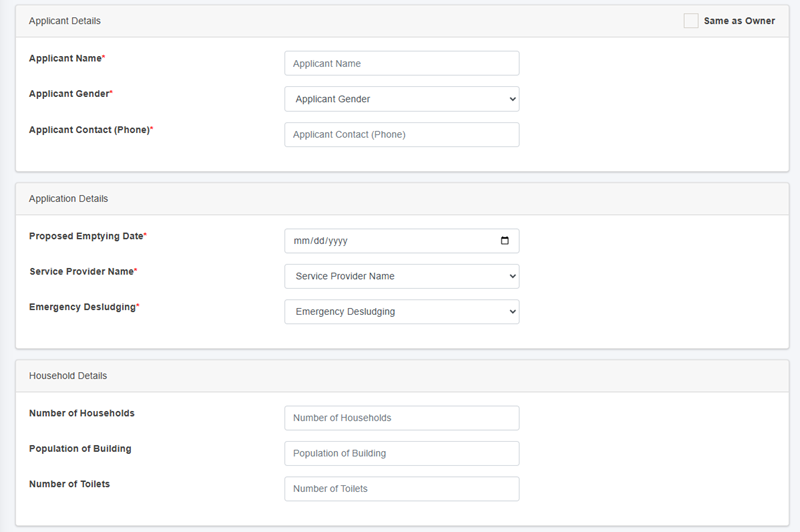
Figure 10- 22 Add Application Form
• After filling out the form, click Save and make sure a pop-up message is displayed, refer to section 7.1 for more details.
• If a mandatory form field is left out or any form failed validation during the form submission a validation message box will be prompted, refer to section 7.2 Validation Message Box for more details.
Overview:
The form fields of the application are explained below:
Address
· Street Name - Identifier for the road the building is connected to. The unique identifier of the building where the containment is located. User can also search for the street code or name using the street name or its code.
· House Number / BIN - The unique identifier of the building where the septic tank is located. Additionally, user can perform searches for the containment id using the house number or BIN.
· Containment ID - The selected House Number / BIN containment ID is displayed here. This field is read-only if only one containment is connected to the building. If there is more than one, a dropdown menu listing the containments connected to the building will appear. If the user selects a containment that is currently active, the application cannot be created until the active containment has been emptied.
· Ward Number - Identifier for the local administrative unit the building/ containment is located.
Owner Details
When House Number / Bin is selected, the owner details are automatically filled and cannot be edited.
· Owner Name - Name of the owner of the building where emptying service is required.
· Owner Gender - The gender of the owner.
· Owner Contact (Phone) - The contact number of the owner, it takes numeric values only.
Applicant Details
· If the applicant is the same as the house owner, select Same as Owner “Checkbox” which will auto-fill the owner’s details as the application details as well, indicating that the applicant is the house owner.
· Applicant Name - The name of the applicant who lodged the application for the emptying service, can be the same as owner.
· Applicant Gender - The gender of the applicant.
· Applicant Contact (Phone) - The contact number of the applicant, takes numeric values only.
· Proposed Emptying Date - The date when the septic tank is proposed to be emptied, only a future date is allowed to be selected.
· Service Provider Name - Identifier for the service provider assigned to provide the emptying service.
· Emergency Desludging - Indicating whether the desludging has a high priority.
Households Details
When the user selects the House Number / Bin, the Household Details section is automatically filled. These fields cannot be edited once the form is submitted, as outlined below:
o Number of Households – The total number of households served.
o Population of Building – The number of population served.
-
-
-
- Number of Toilets – The total number of toilets.
-
-
d) Actions
i. Add Emptying Service Details
• Click on the ‘Add Emptying Service Details’ button.

• This redirects to the Add Emptying Service Details page.
Overview:
· Emptying Information is collected from the mobile app which is the updated in the web application in the application sub-module. This information can also be collected through the web application interface as well, but the use of the mobile application is recommended.
· Refer to the Emptying Information Collection Mobile App User Manual for collecting the emptying information.
· The application must process through each stage in a serial manner. First, only the emptying service details form is enabled, leaving the other two form that is sludge collection status and feedback status disabled. When the user fill in the first form (Emptying details) and submit it, only then the second-page sludge collection status page is enabled and the for the third form page, when the user fill the second form it will be enabled.
· The Edit form/ view details page is prompted only after emptying details are filled and once the application is completed to the final stage the edit button will be disabled.
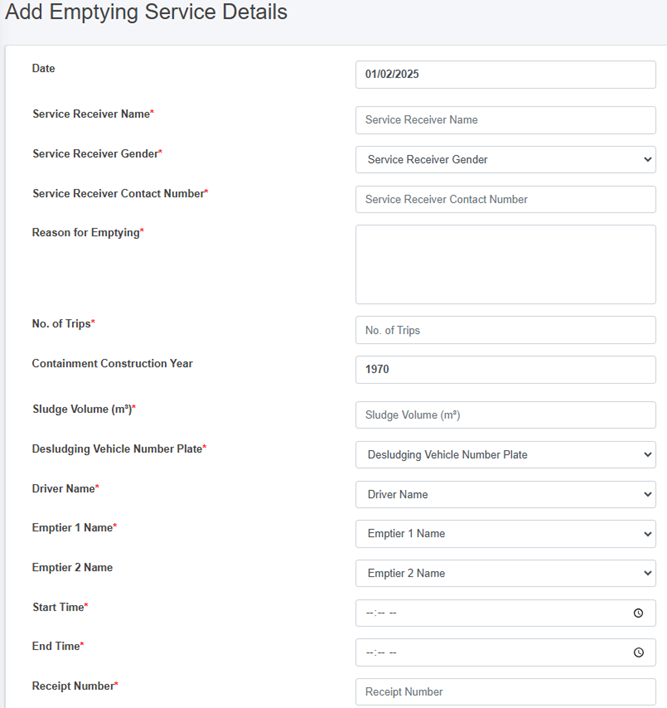
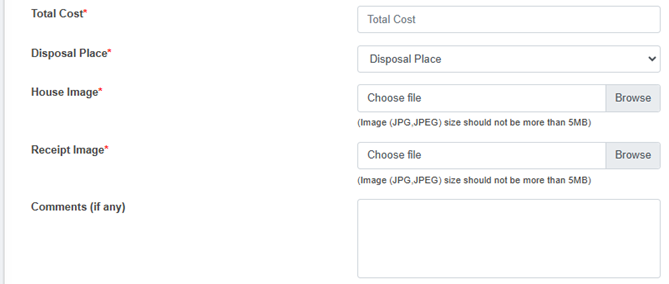
Figure 10- 23 Add Emptying Service Details Form
• After filling out the form, click Save and make sure a pop-up message is displayed, refer to section 7.1 Save for more details.
• If a mandatory form field is left out or any form failed validation during the form submission a validation message box will be prompted, refer to section 7.2 Validation Message Box for more details.
Overview:
The emptying service details can be obtained from mobile as well as from the web. The form fields from the web are explained below:
· Date - The date is auto-filled.
· Service Receiver Name - Name of the person present at the time of emptying.
· Service Receiver Gender - Gender of the person present at the time of emptying.
· Service Receiver Contact Number - Contact Number of the person present at the time of emptying (This field only allows the numeric values).
· Reason for Emptying - The reason for emptying the containment.
· No. of Trips – The number of the trips require to complete the emptying process. (Its value should be at least “1”)
· Containment Construction Year - The year the containment was constructed; this field is auto-filled.
· Sludge Volume(m3) - The volume of sludge (m3) that has been emptied from the containment. (the volume of sludge to be emptied must be less than the containment size)
· Desludging Vehicle Number Plate - The number plate of the desludging vehicle used for emptying. The user must select a vehicle number plate from the list of operational vehicles registered under the chosen service provider.
· Disposal Place - Name of the Treatment Plant where collected sludge will be disposed.
· Driver Name - Name of the desludging vehicle operator of the assigned service provider.
· Emptier 1 Name - Name of the cleaner/emptier employee.
· Emptier 2 Name - Name of the cleaner/emptier employee
· Start time - The start time of the emptying process.
· End Time - The end time of the emptying process (The End time must be after the Start time)
· Receipt Number - Receipt number that is generated after the emptying process is completed.
· Total Cost - The total cost of the emptying process (This field only allows numeric values).
· House Image - Image of the building from where the sludge was emptied.
· Receipt Image - Image of the receipt generated after the emptying process.
· Comments (if any) - Comments from operation, if any.
Note:
- For House and Receipt Image - The user can select the image to fill the field (The image type should be JPEG or JPG with size of less than 5 MB).
- If the house image is uploaded during the add building process, it will not be displayed. However, if it not uploaded, the field will be displayed.
ii. Add Sludge Collection Details
· Click on the ‘Sludge Collection Details’ button.

• This redirects to the Add Sludge Collection page
· The Sludge Collection button is only enabled after the emptying details is filled.
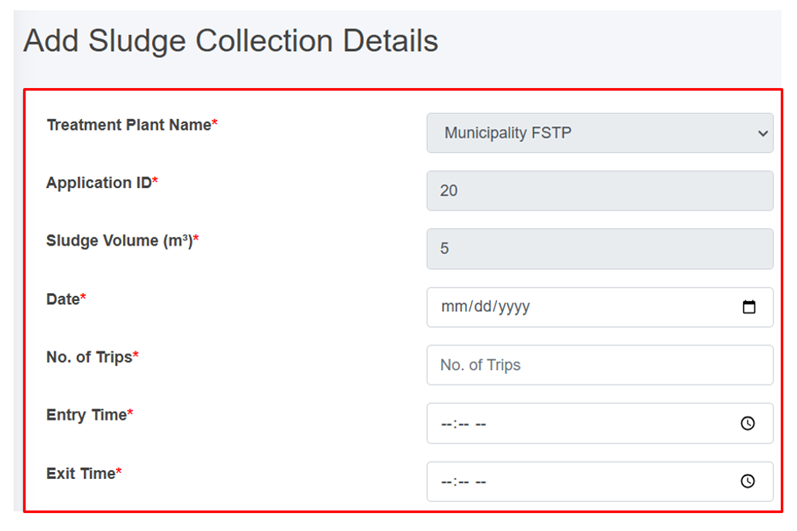
Figure 10- 24 Add Sludge Collection Details Form
- After filling out the form, click Save and make sure a pop-up message is displayed, refer to section 7.1 Save for more details.
- If a mandatory form field is left out or any form failed validation during the form submission a validation message box will be prompted, refer to section 7.2 Validation Message Box for more details.
Overview:
The Sludge Collection details form fields are explained below:
· Treatment plant - Name of the treatment plant where the sludge will be disposed (This field is auto-filled.
· Application ID - A unique identifier for the application submitted by the customer. (This field is auto-filed)
· Sludge Volume (m³) - Volume of sludge (m3) disposed. (This field is auto-filled)
· Date: Date of the sludge disposal (Selected date cannot be before the present date).
· No. of Trips – The number of trips require to complete the sludge collection. (Its value must at least “1”)
· Entry Time - Entry time of a vehicle to FSTP from the sludge collection.
- Exit Time - Exit time of a vehicle to FSTP from the sludge collection site (The exit time should be after the Entry Time).
iii. Add Feedback Details
· Click on the ‘Feedback details’ button.

- This redirects to the Feedback Details page.
- The feedback button is only enabled after filling the emptying service details. Once the user submits the feedback, it can only be view.
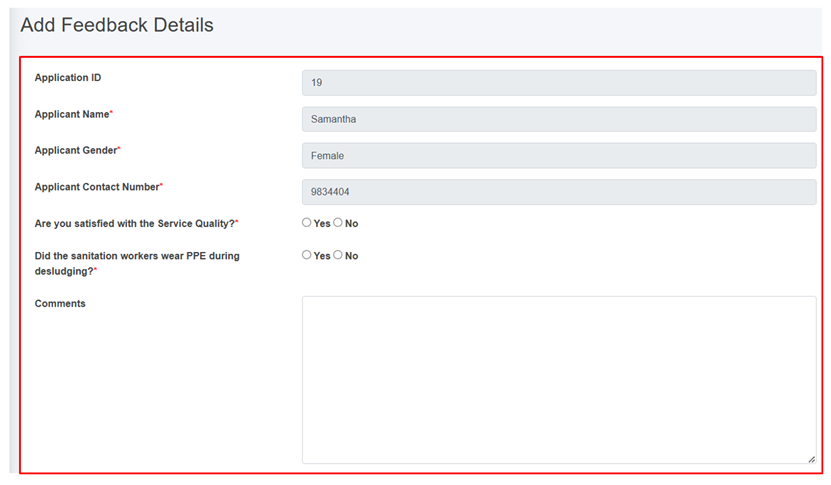
Figure 10- 25 Add Feedback Details Form
- After filling out the form, click Save and make sure a green pop-up message is displayed, refer to section 7.1 Save for more details.
- If a mandatory form field is left out or any form failed validation during the form submission a validation message box will be prompted, refer to section 7.2 Validation Message Box for more details.
Overview:
The feedback form contains different fields which are explained below:
· Application ID: A unique identifier for the application submitted by the customer. (This field is auto-filled)
· Applicant Name: The name of the customer who submitted the feedback. (This field is auto-filled)
· Applicant Gender: The gender of the customer who submitted the feedback. (This field is auto-filled)
· Applicant Contact Number: The contact number of the customer who submitted the feedback. (This field is auto-filled)
· Are you satisfied with the Service Quality?: Indication of whether the customer is satisfied with the Service Quality.
· Did the sanitation workers wear PPE during desludging?: Indication of whether the service provider is wearing Personal Protective Equipment (PPE).
- Comments: Place for the customer to share their thoughts, opinions, or feedback on the service.
iv. Generate Report
Generate report button is activated once the emptying form is filled. Generated report button can be accessed from the Action Column of the Application page. Clicking on the Generate report button generates a PDF report reflecting the current status of the application p to the point it has reached.
· Click on the ‘Generate Report’ button.

- This redirects to the Report page.
Overview:
The user can view the detailed report that has been generated for the selected application.
· After clicking the Generate Report, user is able to download the pdf report for each application.
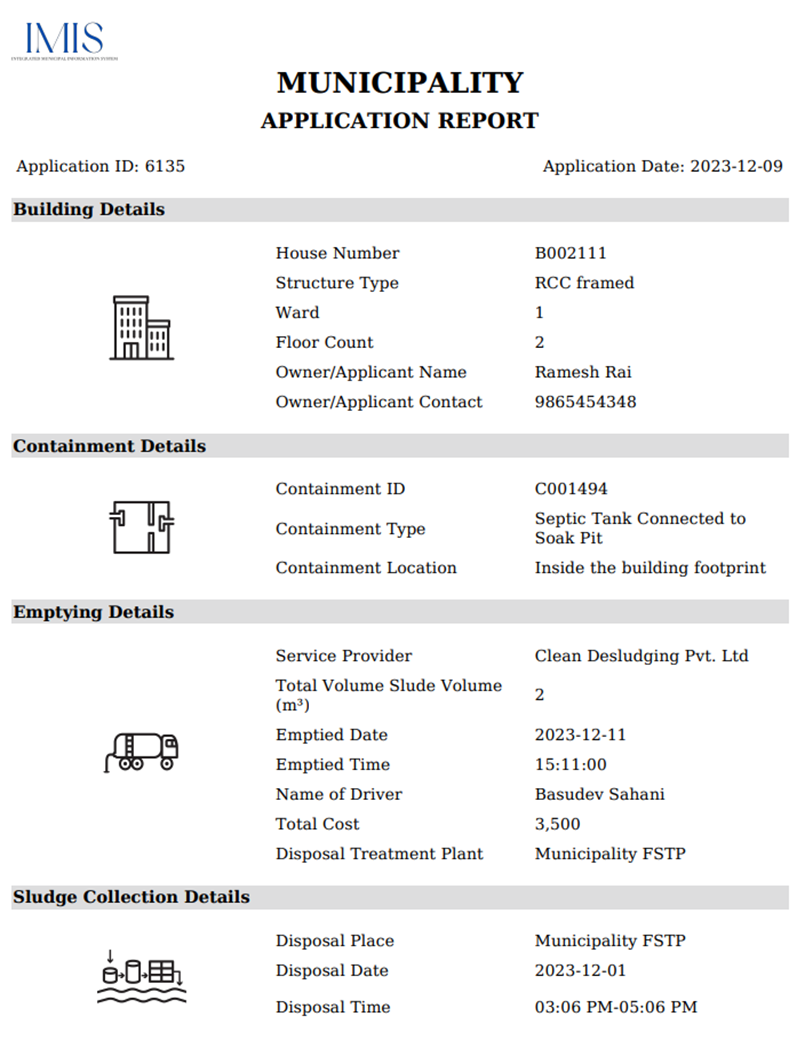
Figure 10- 26 Report generated of a particular application
· The top most part of the pdf contains the applicant’s property details. This includes key details such as the house number, structure type, ward, floor count as well as the owner/ applicant name and contact information.
- The middle section contains the containment and emptying details. The containment details encompass the containment id, type and location. The emptying details include the service provider, total volume of sludge, emptied date, driver’ name, total cost and the disposal treatment plant information.
· The bottom section contains the specifics concerning the sludge collection. It includes disposal place, date and time.
Note:
Deletion of Application data is not permitted when it is associated with emptying data.
10.6.2 Emptying
The Emptying sub-module maintains the information about the emptying history of the containments. It contains information regarding the emptying of the containment.
• Open the sidebar and click on ‘Fecal Sludge IMS’ to expand.
• Now, click on the ‘Emptying Service IMS’ and select ‘Emptying’.
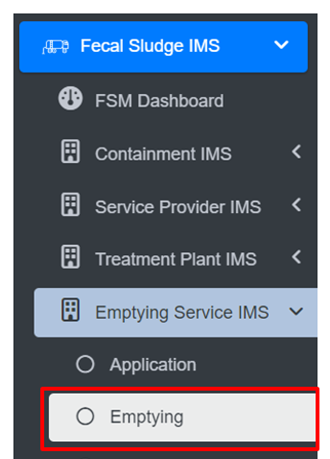
• This redirects to the Emptying page.
Overview:
· User can see the list of emptied containments in the emptying page.
· The Emptying page is to view, export and filter the data that is updated through the application page.

Figure 10- 27 List of Emptied Containments
· To add the emptying service status, navigate to the Application page and click on the Add Emptying Service Details button (refer to section 10.6.1.d. i Add Emptying Service Details).
· View the detailed information on the Emptying (refer to section 6.5 Show Details of Record).
· Check the history of the record (refer to section 6.2 View History).
· Export data (refer to chapter 8 Tools) and filter data (refer to chapter 5 Filters).
Note:
- Deletion of Emptying data is not permitted when it is associated with sludge collection data.
- Deletion of Emptying data is not permitted when it is associated with feedback data.
- If Emptying has been submitted 24 hours ago and the user is not super-admin or sanitation department then deletion is not permitted.
10.6.3 Sludge Collections
The Sludge Collection sub-module maintains the information related to the sludge collection at the treatment plant.
· Open the sidebar and click on ‘Fecal Sludge IMS’ to expand.
· Now, click on the ‘Emptying Service IMS’ and select Sludge Collections.
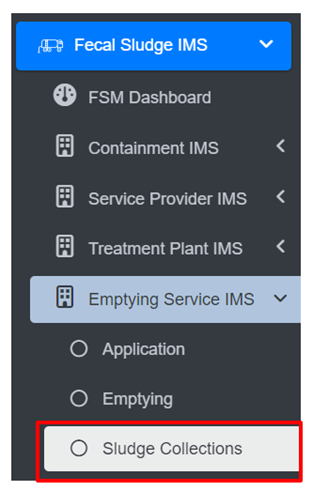
- This redirects to the Sludge Collections page.
Overview:
· User can view the lists of sludge collected from the treatment plant.
· The Sludge Collections page is to view, export and filter the data that is updated through the application page.
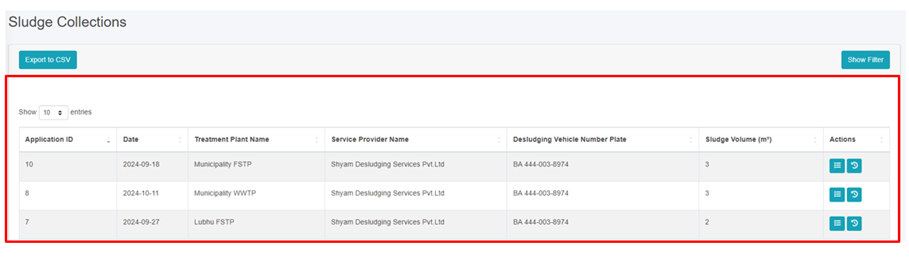
Figure 10- 28 List of Sludge Collection
· To add the sludge collection status, navigate to the Application page and click on the Add Sludge Collection Details button (refer to section 10.6.1 d ii Add Sludge Collection Details).
· View the detailed information of the Sludge Collection (refer to section 6.5 Show Details of Record).
· Check the history of the record (refer to section 6.2 View History).
· Export data (refer to chapter 8 Tools) and filter data (refer to chapter 5 Filters).
Note:
- If the creation date of the sludge record is more than 24 hours prior to the current date, deletion is permissible. The same criteria apply to editing records. If this condition is not met, only individuals with superadmin and the Sanitation Department are authorized to delete the records.
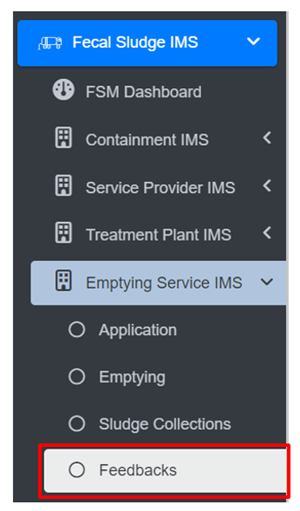
10.6.4 Feedbacks
The Feedback History sub-module maintains the information regarding a list of feedback collected.
· Open the sidebar and click on ‘Fecal Sludge IMS’ to expand.
· Now, click on the Emptying Service IMS and select Feedbacks.
· To add the feedback, navigate to the Application page and click on the Add Feedback Details button (refer to section 10.6.1 d iii Add Feedback Details).
· View the detailed information of the Feedback (refer to section 6.5 Show Details of Record).
· Check the history of the record (refer to section 6.2 View History).
- Export data (refer to chapter 8 Tools) and filter data (refer to chapter 5 Filters).
Overview:
· User can view the lists of Feedback which is collected from the applicants.
· The Feedback page is to view and export the data that is updated through the application page.
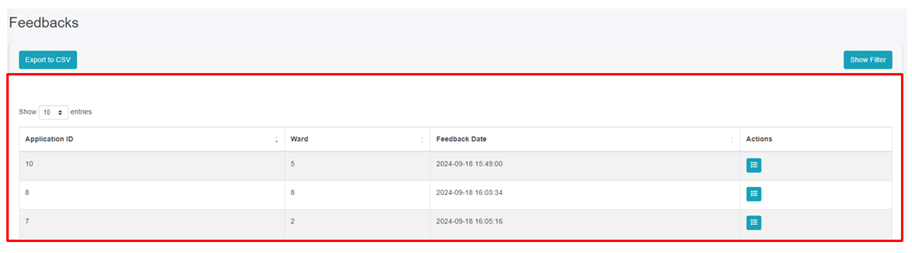
Figure 10- 29 List of Feedback
Note:
· Edit and Deletion of Feedback data is permitted only by super-admin and sanitation department.
· One help desk cannot delete feedback data created by another help desk.
Feedback created at, is more than 24 hours old from the current date, deletion is allowed. The same rule applies to editing. If this time frame has not been met, only super-admin is permitted to delete records.
10.6.5 Help Desks
The Help Desks sub-module maintains information related to the help desk established within the city.
• Open the sidebar and click on the ‘Fecal Sludge IMS’.
• Now, click on the ‘Emptying Service IMS’ and select Help Desks.
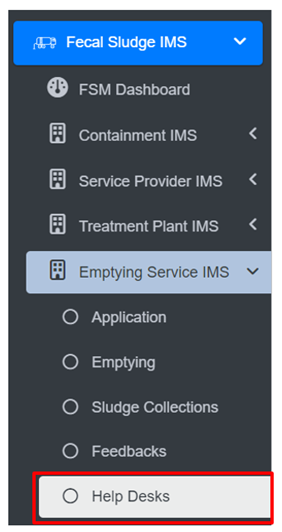
• This redirects to the Help Desks page.
Overview:
User can view the list of help desk created and provides different Filters, Actions and Tools that can be used according to the requirements. For more details (refer to section 5 Filters, section 6 Actions and section 8 Tools).

Figure 10- 30 List of Help Desk
b) Add Help Desk
· Click on the ‘Add Help Desks’ button.
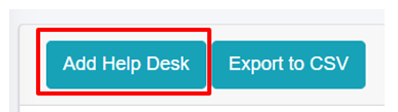
· This redirects to the Add Help Desk form page.
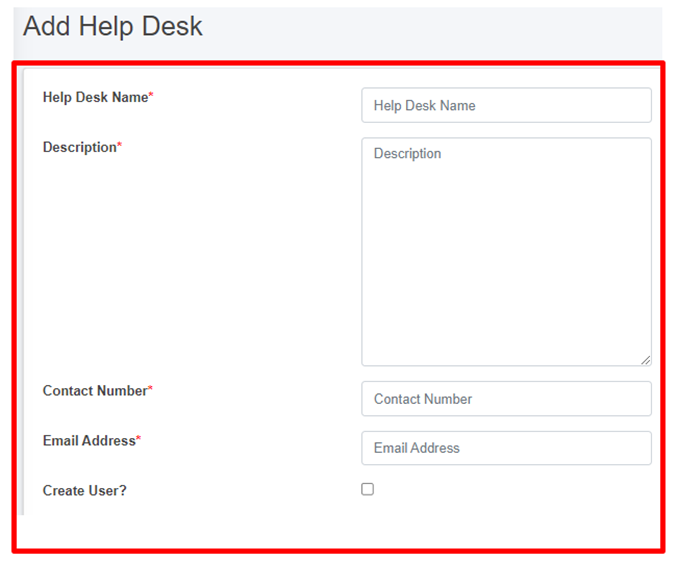
Figure 10- 31 Add new Help Desk
- After filling out the form, click Save and make sure a pop-up message is displayed, refer to section 7.1 Save for more details.
- If a mandatory form field is left out or any form failed validation during the form submission a validation message box will be prompted, refer to section 7.2 Validation Message Box for more details.
Overview:
The form fields of the help desks are explained below:
· Help Desk Name - Name of the help desk.
· Description - Additional information about the help desk
· Contact Number - Contact number of the help desk (It takes numeric values only).
· Email Address - Email address of the help desk
If the "Create User" option is chosen, it is essential to fill in both the "Password" and "Confirm Password" fields, and then the access credentials will be created as well. However, for existing user who do not select the "Create User" option, the password-related fields will not be shown.
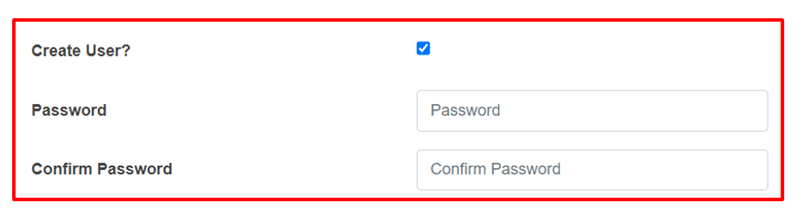
- When the user selects “Create user”, a new help desk user will be created with the corresponding credentials.
Note:
· Deletion of Help Desk data is not permitted when it is associated with User data.