Building Map
Navigate to building map
-
Select the ‘Building Map’ option on the dashboard.
-
Once clicked, map interface is displayed.
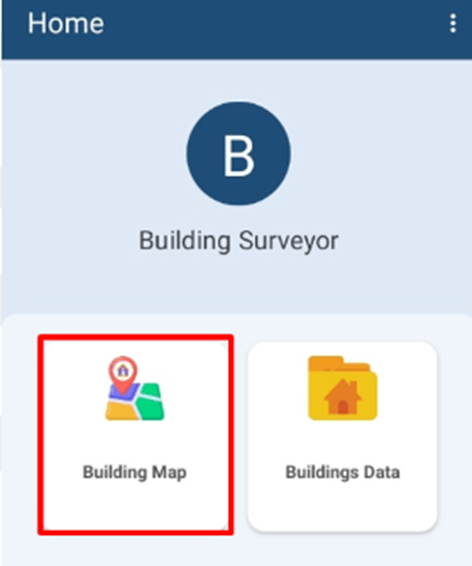
Overview:
- The Building Map option displays the map interface where the user can collect the building footprint by placing markers on the map.
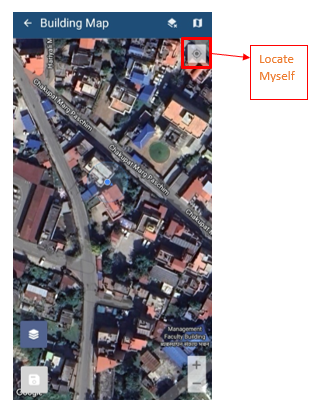
Figure 4-2 Map Interface
-
When a building's outline is already identifiable on satellite data, which is often the case for pre-existing buildings, users have the option to trace the building's corners without needing to visit the site physically. However, it is generally advised to conduct a site visit for data collection purposes.
-
When the Building Data option is selected, the user's location is automatically displayed on the map, and they can also use the "Locate Myself" button to pin-point their exact location.
-
The users may need to manually adjust the map by dragging it to align with the specific location they wish to collect building data from.
-
When there is no building footprint on the satellite data (usually a case when the building has been constructed recently), the user must physically visit the site and trace corner points of buildings.
-
In this case, the user needs to go to each corner of the building and start collecting corners of the building by tapping on the map.
Tools:
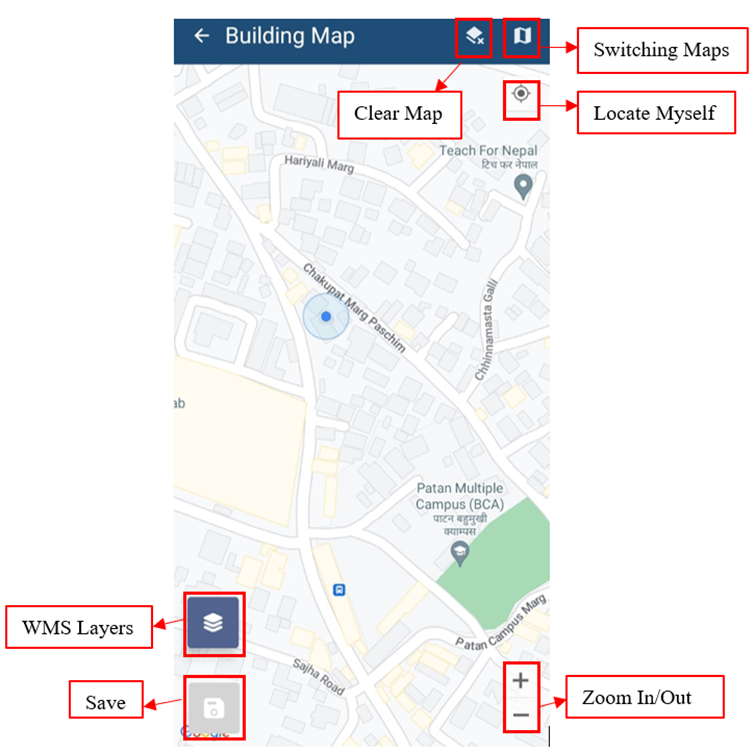

Figure 4-3 Building Map
-
Clear Map: Click to remove added marker.
-
Switching Maps: Click to toggle among various Google base maps e.g.,
Street and Satellite.
-
Locate Myself: Click to locate current position of user.
-
Zoom In/Out: Click to zoom in and out of the map.
-
WMS Layers: Click to get WMS Layers of the map. The WMS Layers is a dynamic tool that draws an overlay on the Map. It can display the different layers of data such as Building Data, Road Data and Ward data. This functionality enables the user to view the digitized data that is stored in the database. Upon clicking on the WMS Layers button, the user is prompted with a pop up to select the layers required. Upon selection, the related data layers are highlighted on the map.
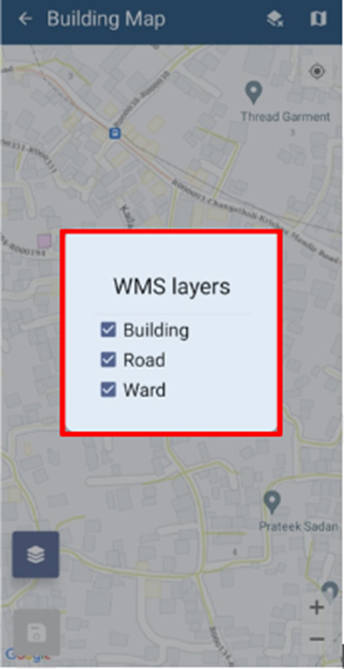
Figure 4-4 WMS Layer Toggle
- Save: Click the save icon to store the added markers.
No Comments