2.4 Extraction of Elevation Profile using SRTM or ASTER DEM
2.4.1 Stepwise Process Flow Details
- Step 1: Install the SRTM Downloader Plugin
o Open QGIS.
o Go to the Plugins menu.
o Select "Manage and Install Plugins."
o In the Plugins dialog, search for "SRTM Downloader."
o Click on the plugin and then click the "Install Plugin" button to install.
- Step 2: Access the SRTM Downloader Plugin
o Once the plugin is installed, you should see a new menu item called "SRTM Downloader" in the QGIS toolbar.
- Step 3: Define Study Area
o Zoom in to your study area in QGIS using the zoom and pan tools.
o Use the rectangle or polygon selection tool to define the area you want to download the SRTM data for. You can find these selection tools in the QGIS toolbar.
- Step 4: Run the SRTM Downloader Plugin
o Click on the "SRTM Downloader" menu in the QGIS toolbar.
o Login using the Earthdata user account.
o In the SRTM Downloader dialog, choose the output folder where you want to save the downloaded data.
- Step 5: Start the Download
o Click the "OK" button to start the download process. The plugin will automatically download the SRTM data for the defined study area.
- Step 6: Process the Downloaded Data
o Once the download is complete, the SRTM data will be available in the output folder you specified.
o You can now use the downloaded SRTM data for your analysis in QGIS.
2.4.2 Output Illustrations
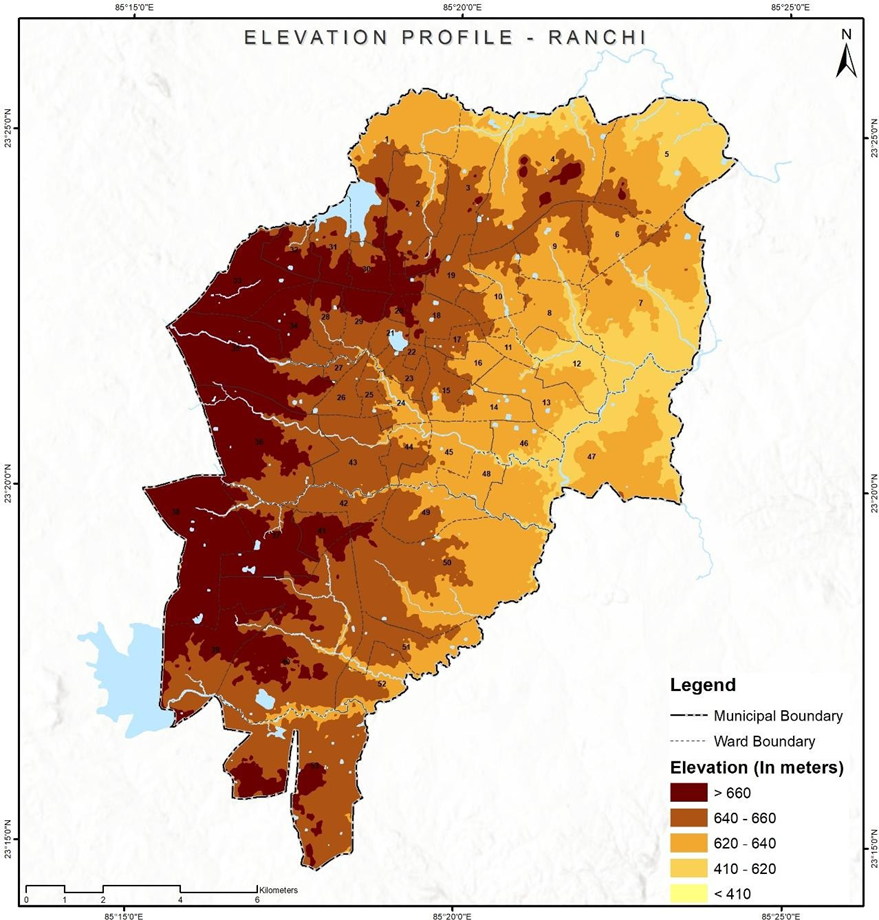
Figure 6 Illustrations of extracted elevation profile, Ranchi (India)
Source – CWIS spatial analysis, Innpact Solutions and GWSC
No Comments