20.1 & 20.2 User Information Management
20.1 User Information Management
The User Information Management sub-module that provides information management capabilities related to user information management are grouped in this panel.
20.2 Users
The Users module is responsible for keeping track of system users. According to the user's defined roles, various users have access to the system at varying degrees. The municipality admin is responsible for creating and keeping up with user’s data.
· Open the sidebar and click on the Settings to expand.
· Now, click on the ‘User Information Management’ and select Users.
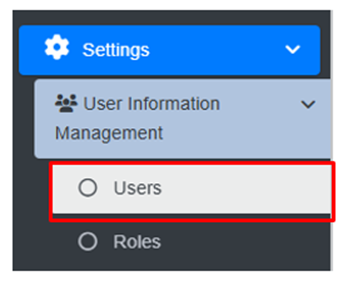
- This redirects to the Users Page.
Overview:
The user can view the lists of existing users in the system.
· User can also create new user (refer to section 20.2.2 Create User).
· Export the data (refer to chapter 8 Tools).
- For more details on the Action buttons (refer to chapter 6 Actions).

Figure 20- 1 List of Users
20.2.2 Create User
Create user tool which allows users with permission to create a new user.
· Click on “Create User” button.
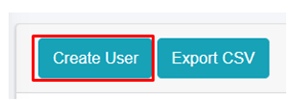
User will be redirected to the following page:
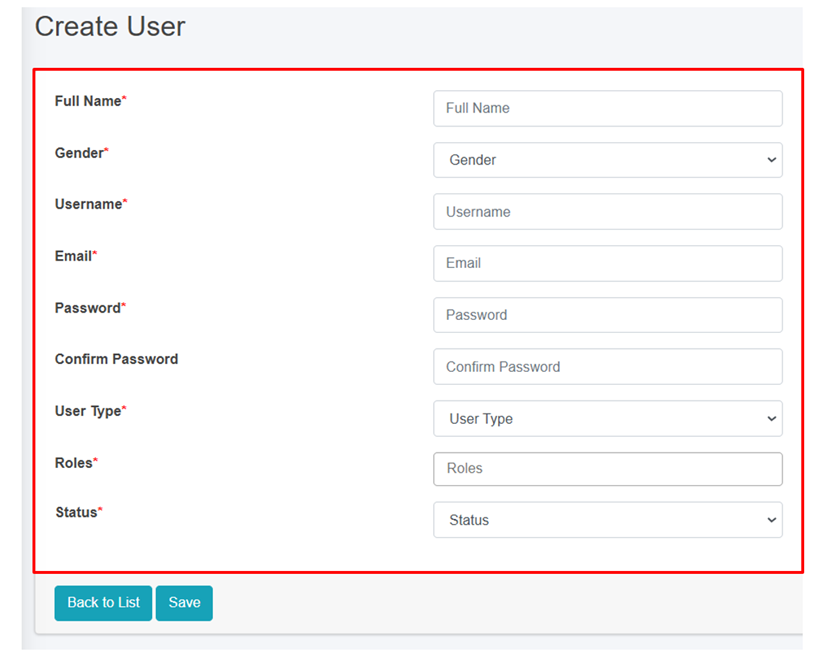
Figure 20- 2 Create new User
· After filling out the form, click Save and make sure a pop-up message is displayed, refer to section 7.1 Save for more details.
- If a mandatory form field is left out or any form failed validation during the form submission a validation message box will be prompted, refer to section 7.2 Validation Message Box for more details.
Users must fill in the required fields which are mentioned below:
· Full Name - Name of the user.
· Gender - Gender of the user.
· Username - Username of the user.
· Email - Email address of the user.
· Password - Encrypted Password of the user.
· Confirm password – Retype the same password again for which user entered for password field.
· User Type - Type of user, such as "Municipality" or "Service Provider"
· Roles - The role from which the user is involved to the specific user type.
- Status – Status of the user in order to access the related roles.
User Form Submission:
The form is dynamically changed according to the User Type that is selected. The role assigned should be carefully selected to ensure the correct role and permissions are being provided to the user.
Overview:
· If a Municipality User is selected, the roles are limited to the Municipality Related Roles.
· If the Treatment Plant User is selected, the roles are limited to Treatment Plant-related roles and the corresponding treatment plant must be chosen as well.
· If the Service Provider User is selected, the roles are limited to Service Provider related roles and the corresponding service provider must be chosen as well.
· If a Help Desk User is selected, the roles are limited to Help Desk-related roles and the corresponding help desk must be chosen as well.
- Choose the appropriate predefined roles and click Save button. The newly created user record will be added at the list.
Note:
· If predefined role is not suitable, the user can add a new role as required via the role page. However, the creator must be careful while creating new role.
· When the user successfully creates a new Role by following the naming convention, the newly created “Role” will be displayed in the Roles Field of Create User form.
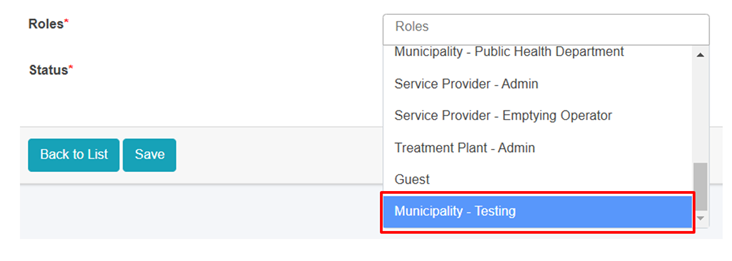
Figure 20- 3 The New Role is displayed in the User Create form
- If the user is associated to any data record, then the deletion is not allowed. If the removal is necessary , it is recommended to change the status to Active/ Operational to Inactive/ Non-operational.
No Comments